Layer2
From Bondix Wiki
Client Setup
- Create separate VLAN interface (Protocol: None, no firewall zone, bridge Interfaces)
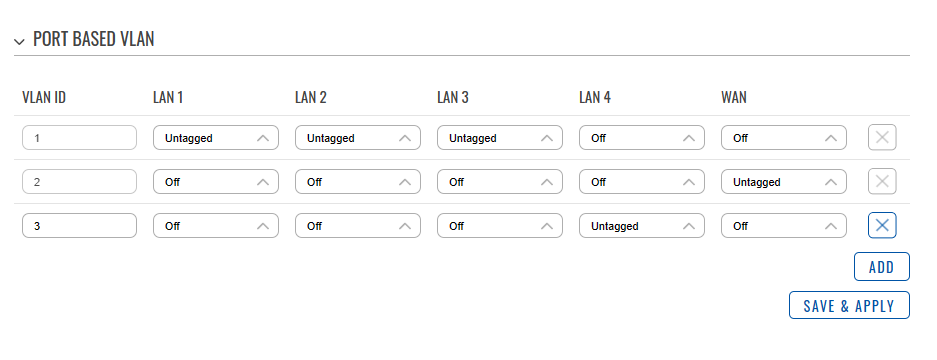
- Step 1: create port based VLAN (Network > VLAN > Port Based). Here we use LAN4 to create a new VLAN with ID 4.
- Step 2: Create Interface (Network > Interfaces > Create New Interface) with the following properties:
- (General Settings) Protocol: none
- (Physical Settings) Bridge Interfaces: yes
- (Physical Settings) Interface: eth0.3 (your newly created interface)
- (Firewall Settings) Firewall zone: unassigned
- Step 3: Enable Layer2 Bonding in Bondix Settings (Network > Interfaces > Bondix Bonding). Select your newly created interface as bridge interface.
- Step 1: create port based VLAN (Network > VLAN > Port Based). Here we use LAN4 to create a new VLAN with ID 4.

Server Setup
- Create network bridge on Linux server
- Make sure that bridge-utils is installed
- Static IP Address
- via netplan: /etc/netplan/50-cloud-init.yaml, e.g.:
network:
    version: 2
    ethernets:
        eth0:
            <KEEP AS IS>
    bridges:
        sabr0:
            addresses: [ 10.133.7.1/24 ]
- Configure DHCP server
- in /etc/dhcp/dhcpd.conf add:
subnet 10.133.7.0 netmask 255.255.255.0 {
  range 10.133.7.26 10.133.7.250;
  option domain-name-servers 8.8.8.8, 8.8.4.4;
  option subnet-mask 255.255.255.0;
  option routers 10.133.7.1;
  option broadcast-address 10.133.7.255;
  default-lease-time 600;
  max-lease-time 7200;
}