Client Installation
Client Installation
| ⚠️ | We strongly recommend you reset all router settings before starting the installation. |
|---|
Visit - Teltonika and download the .TAR.GZ file matching your Teltonika router’s firmware version.
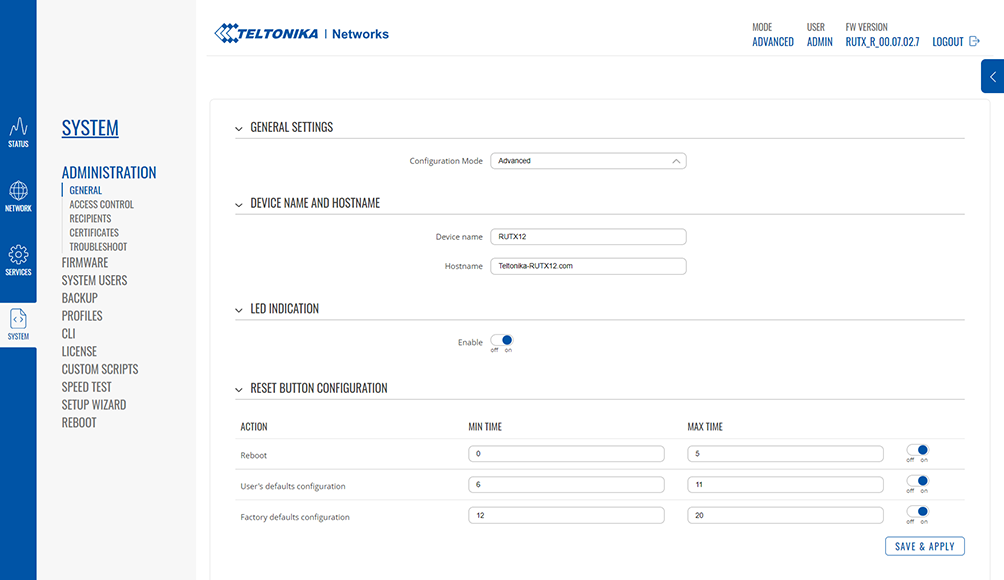
To install the Bondix S.A.NE Client, you will need administration rights on your Teltonika router. For that, make sure you have chosen the option “Advanced” in the section “System” › “Administration” › “General Settings” › “Configuration Mode”.
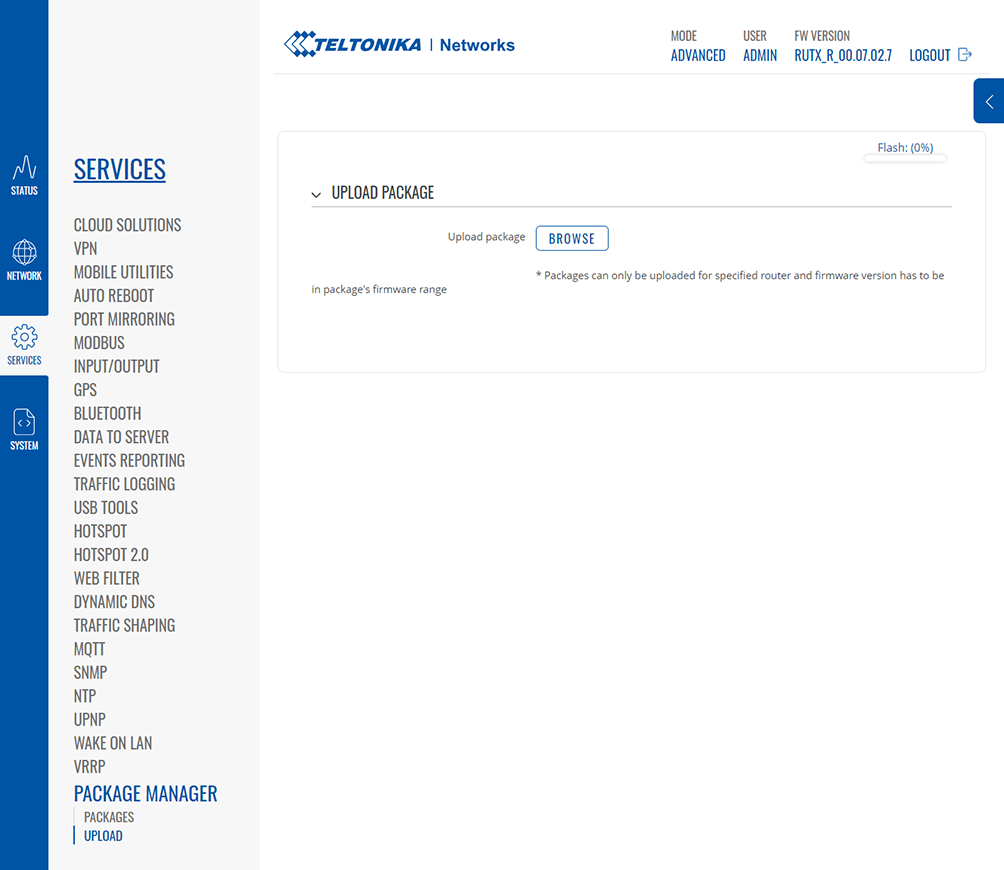
Open your Teltonika router menu, navigate to the menu item “Services” › “Package Manager” › “Upload”. Click on “Browse”, choose the file you just downloaded to upload it to the router, and then press “Install Package”.
| ⚠️ | There will be a package verification popup dialogue telling you the Bondix S.A.NE Client is an unauthorized package.
Click on “proceed” to continue with the installation. |
|---|
Also, there will be a popup dialogue telling you that the package installation needs a reboot. Click on “Reboot” to finish the installation. If this prompt doesn’t appear which may happen due to technical issues, reload your Teltonika router’s web interface (STRG+F5 / Command+R) and reboot manually (“System” › “Reboot”).
If the Bondix S.A.NE Client was installed correctly, you’ll find a new menu item “Bondix S.A.NE” in the section “Network” of your Teltonika router.

