Advanced Settings: Difference between revisions
From Bondix Wiki
(Created page with "Category:Manual Category:7.02.x ==== Advanced Settings ==== Make sure to choose the following advanced settings for the S.A.NE Client on your Teltonika router: center|border {| class="wikitable" ! Field !! Value |- | Enable Bonding Proxy || On Enable this proxy if you’re bonding connections with vastly different latencies (e.g. DSL and 5G/LTE), since it optimizes TCP connections and increases your overall throughput. |- |...") |
No edit summary |
||
| Line 1: | Line 1: | ||
==== Advanced Settings ==== | ==== Advanced Settings ==== | ||
Make sure to choose the following advanced settings for the S.A.NE Client on your Teltonika router: | Make sure to choose the following advanced settings for the S.A.NE Client on your Teltonika router: | ||
Revision as of 14:15, 31 May 2023
Advanced Settings
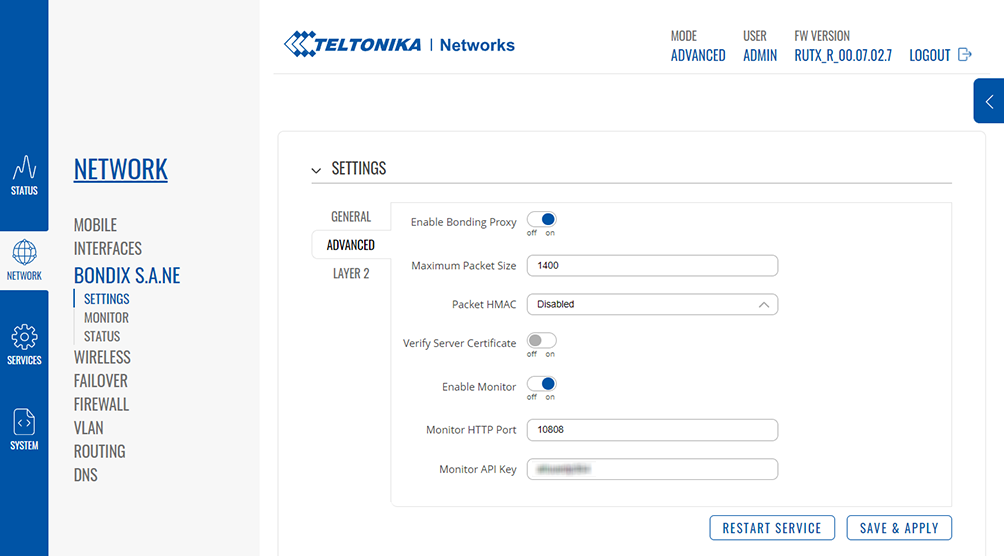
Make sure to choose the following advanced settings for the S.A.NE Client on your Teltonika router:
| Field | Value |
|---|---|
| Enable Bonding Proxy | On
Enable this proxy if you’re bonding connections with vastly different latencies (e.g. DSL and 5G/LTE), since it optimizes TCP connections and increases your overall throughput. |
| Maximum Packet Size | 1400
Change to lower setting if S.A.NE’s automatic MTU packet size detection fails. |
| Packet HMAC | Disabled
Set this value to “SHA256” only if you need tampering-proof data transfer since it reduces the general Bondix S.A.NE performance. |
| Verify Server Certificate | If required, a server certificate can be uploaded here.
Set option to “on” and browse for your CA file to upload. |
